We offer complete lawn sprinkler system design & technical help
We can design your lawn sprinkler system for you with the following help from you, Either fax or e-mail a certificate of survey of your property, which is available from the city if you don't have one, Otherwise you will need to measure your yard following the simple steps below.
Measuring Your Yard
The first step to designing your sprinkler system is to measure your property.
•Step 1. Measure the distance around the outer edge of your lawn otherwise known as the property line. Draw the measurements on graph paper as you measure.
•Step 2. Measure the distance around the house and any landscaping you might have around the house, and add the measurements on the graph paper.
•Step 3. You will need to figure out where the house sits on the lot, and that can be done by the following, Measure from the front right corner of the house to right side property line and mark that on the paper, Then measure from the front right corner of the house to the street and mark that on the graph paper.
Water Pressure & Water Flow
Once you have the yard measured, you will have to figure out your water pressure and your gallons per minute, To figure out your G.P.M or gallons per minute, you will need a 5 gallon pail and a watch, for the PSI, you will need a pressure gauge.
Go to the faucet closest to where your main water line will be feeding your sprinkler system, Be sure you have a watch with a second hand, Closely time how long it takes to fill a five gallon pail. 30 seconds = 10 gallons per minute. 20 seconds = 15 gallons per minute, 15 seconds = 20 gallons per minute. Accuracy is very important.
Installing Your Sprinkler System
The first step is deciding what type of backflow device you will be using. Double Check and Reduced Pressure backflows can be installed in the house. Pressure vacuum breakers are normally installed outdoors.
First, making sure the waterline is off, have a licensed plumber cut your mainline as close to the water meter as possible. You will install a tee at this location. Coming from the tee will be a shut off Ball valve. After the ball valve install the Double Check or RPZ back flow device, then a boiler drain for winterizing. Run your new sprinkler line outdoors.(we recommend 3/4 or 1" copper) For a PVB, this is where most are installed.
Keep in mind, the PVB needs to be installed 18" or higher than the highest sprinkler head. Attach the pipe to the inlet side of the vacuum breaker and come out of the vacuum breaker with copper into the ground and go down at least 6", From there you can change it over to poly or PVC pipe or attached directly to the manifold.
Pipe
The next step is to run the main water line to valves. You will also want to run your control wires with the main water line. Once the main water line is in, it is time to install all of the lateral lines. Pull the lateral lines from the valve box to the sprinkler heads. When you have installed all of the sprinkler pipe it is time to put in the valves.
Valves
The first step to installing the valves is to build a manifold, you will need to decide Whether or not you want to use ready made manifolds or you want to make them yourself, Ready made manifolds are much easier to install and replace if a valve has to be changed out some point in time. It is also easiest to install the valve manifold and valves above ground and only have to make connections in the valve box hole.
Once everything is assembled, It is now time to connect the valves to the main and lateral lines. When connecting to the pipe be sure all of the clamps are fastened down tight. Radiator clamps will work but are not recommended, Otiker Clamps (gear clamps) will work much better and will last 10 times as long. When connecting the wires to the valves, Use the white wire as the common ground wire, When you wire the controller in, It will be much easier to figure out what wire is what.
Connections
After that you will want to make all of your connections through out the yard, Put in any elbows, tees or couplers. Tip: if the fittings are hard to push in the pipe, use a rubber mallet to tap them in. Again be sure that all of your clamps are tight and you didn't forget any.
Sprinkler Heads
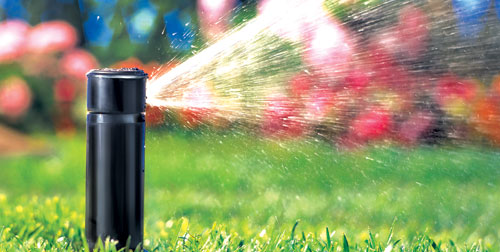
When you are putting your heads in you will want to make sure that there are no kinks at the end of the line and that the pipe lays flat in the ground. Once you attach the saddle you will then put the threaded by barb fitting in the saddle and also the head. You can use a torch to heat up the pipe, It will make it much easier to push over the barbs, Only heat it up until it is shiny.
 Water Works Irrigations
 Thinking of putting in an irrigation system yourself?Save Money and Install Your Own Sprinkler System with our Do - It - Yourself Kits. Instruction available. If you have been considering a system, whether installed by someone else or put in yourself, let us know.